Paper mache! Or, if you are feeling fancy, papier-mâché! I’ve only made a couple of things out of paper mache: a kangaroo rat, and Andrew’s head. Apparently you can use it to make anything though so recently thought I might try making an anatomically correct (OR THEREABOUTS) heart.
I crumpled up newspaper into an ovoid shape (I tricked Mallory into finding me some good models of hearts to look at online) and held it together with tape and then I covered it with strips soaked in flour and water. That, by the way, is the most basic recipe for paper mache. You can throw in white Elmer’s glue, I guess, and maybe it does something to make the end result harder? I doubt it though since the flour and water is pretty darn sturdy by itself.
Right, anyway, I covered the ovoid with paper mache and let it dry overnight three times. It felt pretty sturdy. So I cut it in TWO.
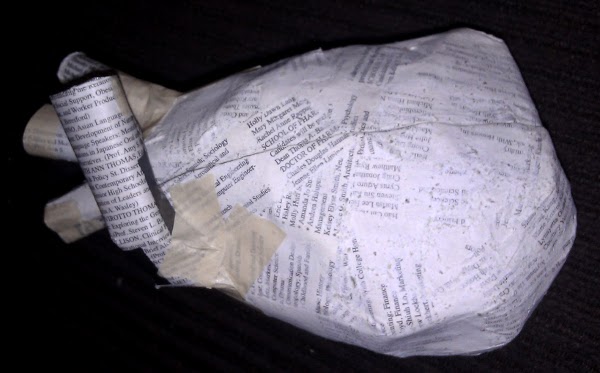
I was just sort of making things up as I went along. I used a few little pieces of duct tape to make hinges for the back of the heart and then rolled up tubes of newspaper and affixed them with masking tape to make the aorta and superior vena cava. I definitely just looked up those names on Wikipedia.
Several more layers of paper mache affixed the aorta and hid the duct tape. Then I had the great idea to put in magnets so that the heart would clasp closed.
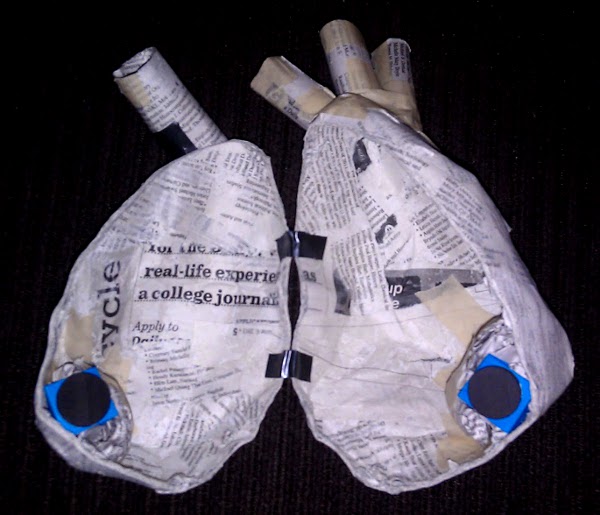
I built little places for the magnets to sit out of paper and tape and then covered them with more paper mache. I also put a pair of magnets at the top of the heart to make sure that once it was closed it would STAY closed. I very carefully only put ONE layer of paper mache directly on the magnets themselves since I wanted their connection to be as strong as possible. I figured that more paper mache would equal more distance which would equal less magnetic force and I think physics probably agrees with me.
Some white spray paint served to hide most of the newsprint (note that I did not say ALL of the newsprint) and then I gave it a few layers of red spray paint and speckled blue spray paint as well. This started out as “let’s just see what it looks like red before I put on the non-spray paint that I purchased for coloring the heart” but it came out looking good enough that I decided to forego the unpleasant task of daubing paint on manually. Also, you may not know this about me, but I sure do love speckles.
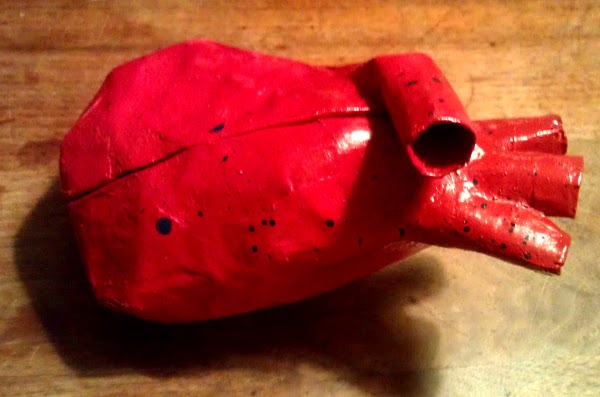
Hooray! It looks enough like a real heart that people will know what it is but not enough that they will be seriously sicked out from looking at it. Pretty much the exact happy medium I was shooting for!
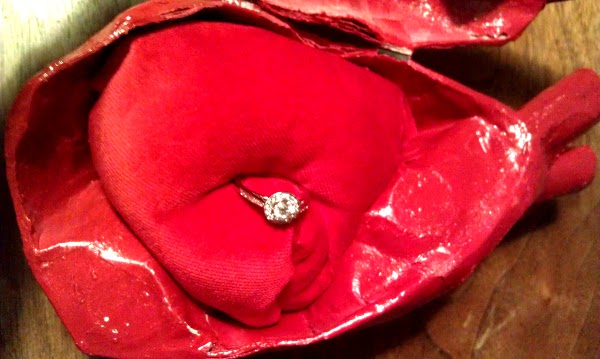
I also bought some velveteen to make a little pillow to stick in the heart. A pillow really classes things up and serves as a nice place to stick things like rings or teeth. Making the pillow was pretty tricky since I decided to continue my strategy of “winging it”. I don’t think I got the shape exactly right inasmuch as I just made it square when I probably should have made it more triangular. Regardless, I was able to wedge it in pretty firmly and sort of position a ring where I thought one might look nice.

I really doubted the pillows ability to hold onto a ring so I used a single loop of thread to affix it to the pillow. Be careful that you don’t drop paper mache in water. I didn’t do that to my heart but it would probably be ruinous.
Altogether it took about a week and a half to make the heart. I think you’ll agree that regardless of how mediocre you think the end product that it came out WAY better than it had any right to.
Next: give the heart to yo sweetie!
NO one could have made it better! Your skills never cease to amaze me.
Such talent. And you are truly the speckle king. And I’m so glad that you chose such a great sweetie to give it too!
Nice job! You did a good job on the aorta with the arteries branching off!
Pretty Amazing!
Rylee says that is a nice purse, high compliments from her. I think it is a little sickening but overall you did a pretty great job! I hear Mallory was liking it so that means it is a great success. The only persons opinion who matters is the one you are giving it to!
Gosh thanks, everybody!
So did Scarlett Johansson say yes??!?
I decided I’d go for the gold and ask Mallory instead!